Say Goodbye to Leaks and Low Pressure: The Ultimate Shower Faucet Replacement Guide (For All Skill Levels)
Is your shower faucet leaking, rusty, or simply outdated? Stop putting up with it! Whether you're a homeowner looking to upgrade your bathroom or a seasoned plumber, this guide will equip you with all the knowledge you need to replace your shower faucet. We'll delve into the installation steps for exposed and concealed shower faucets, share insider tips, and address common issues to ensure your showering experience is revamped.
Last Updated: July 2025 | Estimated Reading Time: 15 minutes
This Article Will Help You Discover:
- How to choose the right type of shower faucet for your needs?
- Detailed steps (with images) for replacing exposed and concealed shower faucets
- Secrets from professional plumbers: save time, effort, and avoid mistakes
- Troubleshooting common issues: leaks, low water pressure, connection difficulties
- Wholesaler/Importer Purchasing Guide: quality control, after-sales service
- [Industry Outlook] Development trends in smart shower faucets
Preparation: The Key to Success

The first and most crucial step in any plumbing project is thorough preparation.
- Safety First: Always turn off the main water supply to your house. This is usually located near the water meter or in the basement or garage. Once off, turn on the shower faucet to drain any remaining water in the pipes.
- Tools and Materials Checklist: Depending on the type of shower faucet, you may need the following tools and materials:
- Adjustable wrench
- Pipe wrench
- Channel-lock pliers
- Flathead and Phillips screwdrivers
- Thread sealant tape (Teflon tape)
- Rags or towels
- New shower faucet (be sure to purchase a model that is compatible with your existing plumbing)
- S-connectors (if needed)
- Measuring tape
- Level
- Caulk
- Tile saw or chisel (for concealed faucets)
- Sand, Ash and cement (for concealed faucets)
- Spare tiles (for concealed faucets)
- Optional: Rust Remover, Penetrating Lubricant (WD-40)
- Inspection 3: Observe the type and connections of the old faucet to prepare for the subsequent steps.
I. Exposed Shower Faucet: The Easy Replacement Guide
Exposed shower faucets are the most common type and are relatively easy to replace 2.
Difficulty: ⭐
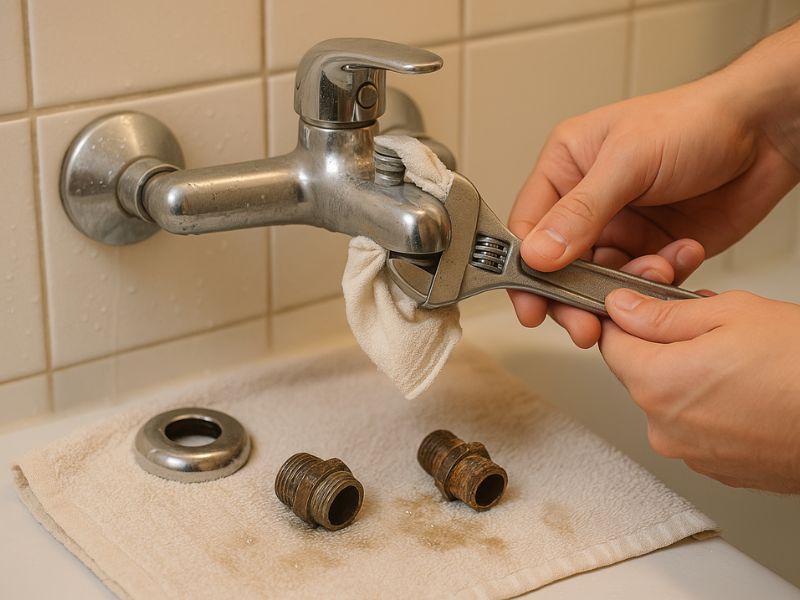
Step 1: Remove the Old Faucet
- Protection First: Wrap the connections of the old faucet with a rag or towel to prevent scratches.
- Release Connections: Use an adjustable wrench or pliers to loosen the connections of the old faucet to the wall pipes by turning counterclockwise. If the connection is severely corroded, try using penetrating lubricant (such as WD-40) for lubrication.
- Remove the Old Faucet: Carefully remove the old faucet. Watch out for any remaining drips of water.
Step 2: Install S-Connectors (If Needed)
- Check Spacing: Check whether the spacing of the wall pipes matches the inlet of the new faucet. If it doesn't match, you need to use S-connectors (eccentric joints) to adjust it.
- Wrap with Teflon Tape: Wrap a few turns of thread seal tape clockwise on the threaded ends of the S-connectors. This will help prevent leaks. Plumber Tip: Applying a small amount of pipe sealant on top of the Teflon tape can further improve the sealing effect.
- Install S-Connectors: Screw the S-connectors onto the wall pipes and tighten them with a wrench. Pay attention to the direction of the elbow so that it is aligned with the inlet of the new faucet.
- Adjust Spacing: Use a tape measure and level to accurately adjust the spacing and level of the S-connectors. Tip: For perfect alignment, use a level to ensure the S-connectors are perfectly horizontal, preventing strain on the faucet and ensuring even water flow.
Step 3: Install the New Faucet
- Install Decorative Covers: Slide the decorative covers onto the S-connectors. Plumber tip: Before installing the decorative cover, you can use silicone caulk to seal between the wall and the decorative cover to prevent water from seeping into the wall.
- Connect the Faucet: Connect the inlet of the new faucet to the S-connectors. Tighten by hand and then gently tighten with a wrench. Do not overtighten! Wrap the wrench jaws with a soft cloth to prevent scratching the faucet surface.
- Connect the Shower Hose: Connect the shower hose to the outlet of the faucet, making sure the connection is secure.
Step 4: Testing
- Open the Main Water Valve: Slowly open the main water valve to the house.
- Check for Leaks: Carefully check all connections for leaks. If there is a leak, tighten the connection or re-wrap the thread seal tape.
- Test Functionality: Turn on the shower faucet to test whether the hot and cold water functions are normal.
The installation of concealed shower faucets requires more professional skills and more preparation 2.
Difficulty: ⭐⭐⭐
Step 1: Remove the Old Faucet
- Cut off the Water Supply: Make sure the main water valve to the house is closed.
- Remove Tiles: Use a tile saw or chisel to carefully remove the tiles around the old faucet. Plumber tip: Before removing the tiles, use an art knife to cut the caulk along the edges of the tiles, which can reduce the risk of tile breakage.
- Remove Wall Material: After removing the tiles, expose the pipes and faucet body inside the wall.
- Disconnect the Connections: Use an adjustable wrench or pliers to disconnect the old faucet from the pipes.
- Remove the Old Faucet: Carefully remove the old faucet body.
Step 2: Install the New Faucet
- Connect the Pipes: Connect the new faucet body to the pipes inside the wall. Be sure to use thread seal tape and pipe sealant to ensure the connection is tight. Plumber tip: Using brass or copper fittings can improve the reliability and durability of the connection.
- Secure the Faucet: Use screws or other fasteners to secure the new faucet body to the wall.
- Test Connections: Briefly open the main water valve to check for leaks at the connections. If there is a leak, immediately close the main water valve and check whether the connection is firm.
- Restore the Wall: Use sand, ash and cement to restore the wall. Remember to use leak-proof filler before applying sand, ash, and cement.
- Retile: After the wall is dry, re-tile it.
Step 3: Final Touches
- Grout: After the tiles are completely dry, use grout to fill the gaps between the tiles.
- Clean: Clean the shower area and remove all debris.
- Test: Open the main water valve again and test all functions of the new shower faucet.
Extra Tips (Applicable to all installations):
- Plumber's Tape Trick: When wrapping Teflon tape, make sure to wrap it in the opposite direction that the fitting will be tightened. This means if you're tightening clockwise, wrap the tape counterclockwise. This ensures the tape stays snug as the connection tightens, rather than unraveling.
- Lubricate Fittings: Before tightening threaded fittings, coat them with a small amount of pipe dope (pipe thread sealant). This helps the fittings tighten smoothly without excessive force and potential damage to the threads. It also makes them easier to disassemble in the future for repairs or replacements.
- Check for Leaks: Always turn the water supply on slowly and use a flashlight to carefully inspect all connections for leaks. It’s better to catch a leak now than after it’s caused water damage. If you find a leak, first make sure all connections are snug, then consider using more Teflon tape or pipe dope.
- Professional Tools 2: Power Wrenches, Pipe Cutters, Pressure Testers, etc.
- Experience 2: Quickly identify problems and accurately solve them.
- Safety Awareness 2: Strictly abide by operating procedures to avoid safety accidents.
When to Seek Professional Help:
- Replacing a concealed faucet is more difficult, and it's easy to make mistakes if you lack experience 2.
- If you encounter a problem that you cannot solve, do not force it, as it may damage the pipes 2.
- For safety and peace of mind, leave it to a professional plumber 2.
Wholesaler/Importer Purchasing Guide:
- Choose reliable and reputable suppliers 2.
- Understand the characteristics of different brands and models to provide customers with a variety of options 2.
- Partner with local plumbers to provide installation services 2.
Development Trends in Smart Shower Faucets
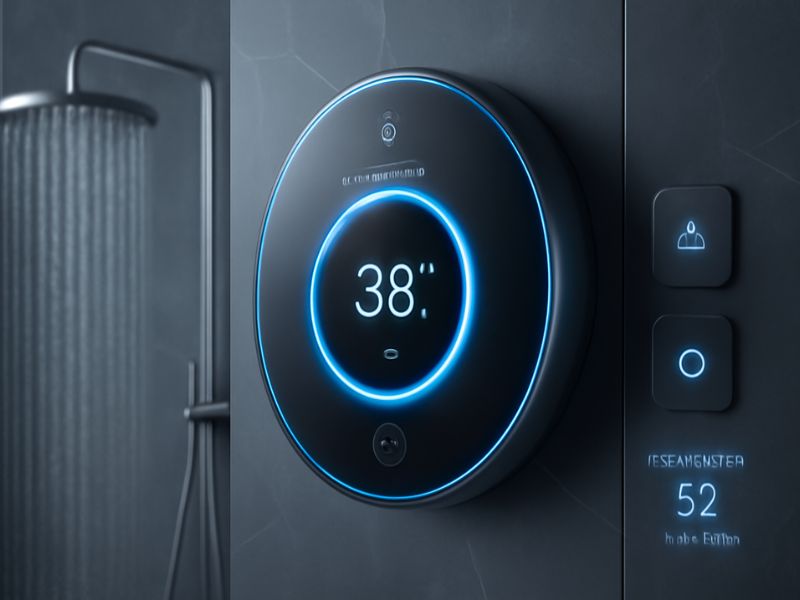
With the continuous development of technology, the concept of smart homes is becoming increasingly popular. Shower faucets are also gradually developing towards intelligence. Future smart shower faucets may have the following functions:
- Temperature Memory: Memorize the user's preferred water temperature and automatically adjust to the optimum temperature each time you shower.
- Flow Control: Automatically adjust the water flow according to user needs to achieve water saving and energy conservation.
- Voice Control: Control the switch, temperature, and flow of the faucet through voice commands.
- Water Quality Monitoring: Real-time monitoring of water quality to remind users to replace the filter element.
- Scene Mode: Provide a variety of shower scene modes, such as relaxation mode, vitality mode, etc., to meet different user needs.
- Like Hansgrohe, provide advice on bathroom products [1, 4].
- Hansgrohe Aquademie Experience Products 1
- Choose the right thermostat 1
Table: Common Problems and Solutions for Shower Faucets
| Problem |
Possible Cause |
Solution |
| Leakage |
Loose connections, aging Teflon tape, damaged O-rings |
Tighten connections, replace Teflon tape, replace O-rings |
| Low Water Pressure |
Pipe blockage, faucet internal blockage |
Clear pipes, clean or replace faucet |
| Uneven Hot/Cold Mixing |
Cartridge failure |
Replace cartridge |
| Loud Noise |
Pipe resonance, unstable water pressure |
Secure pipes, install pressure reducing valve |
| Surface Rust/Corrosion |
Poor water quality, poor material quality |
Replace with high-quality faucet, install filter |
Table: Advantages and Disadvantages of Different Types of Shower Faucets
| Type |
Advantages |
Disadvantages |
Applicable Scenarios |
| Exposed |
Simple installation, easy maintenance |
Ordinary appearance |
Limited budget, strong DIY ability, low requirements for appearance |
| Concealed |
Beautiful and generous, space-saving |
Complex installation, difficult maintenance |
High requirements for appearance, sufficient budget, professional installation team |
| Thermostatic |
Stable water temperature, comfortable and safe |
Higher price |
High requirements for water temperature stability, families with the elderly or children |
| Smart |
Rich functions, convenient to use |
High price, requires power supply |
Pursuit of intelligent experience, sufficient budget |
Table: Key Points for Purchasing Shower Faucets
| Key Point |
Description |
Suggestion |
| Material |
Copper, stainless steel, ceramic, etc. |
Choose corrosion-resistant, lead-free materials that meet national standards |
| Cartridge |
Ceramic cartridge, stainless steel cartridge |
Choose a cartridge with a long lifespan and good sealing |
| Surface Treatment |
Electroplating, painting, wire drawing, etc. |
Choose a wear-resistant, easy-to-clean surface treatment |
| Water Saving Performance |
Flow restriction, air injection |
Choose water-saving certified products |
| Safety Performance |
Anti-scalding design, anti-backflow design |
Ensure safe use |
| Brand Reputation |
Well-known brands, good reputation |
Choose a brand with complete after-sales service |
Recommended Internal Links:
- How to Choose the Right Shower Head for You?
- Shower Room Design: Creating a Comfortable Bathing Space
- Bathroom Product Maintenance: Secrets to Extending Service Life
Recommended External Links:
- U.S. Environmental Protection Agency (EPA) WaterSense Program
- Wikipedia: Shower
- NSF International (The Public Health and Safety Organization)
[Case Sharing]
Mr. Li, a senior DIY enthusiast, recently successfully replaced the old shower faucet at his home with an intelligent thermostatic shower system. When sharing his experience, Mr. Li especially emphasized the following points:
- "Be sure to do your homework in advance, understand the plumbing situation in your home, and choose the right product."
- "Don't panic when you encounter problems during the installation process, check more information and consult professionals more."
- "Safety first! Be sure to turn off the main water valve and take the necessary protective measures."
Mr. Li's success story tells us that as long as we prepare fully and take the correct steps, even a DIY novice can successfully complete the shower faucet replacement.
Conclusion:
Whether you are a seasoned professional or a first-time DIY enthusiast, with proper preparation and the right steps, you can successfully replace a shower faucet. Remember, safety first! If unsure, always consult a professional’s opinion 2.
- Choose Hansgrohe and fill your bathroom life with emotions and extraordinary moments 4.
- Hansgrohe provides advice on bathroom products [1, 4].
- Hansgrohe Aquademie Experience Products 1
- Choose the right thermostat 1


