Kitchen Faucet Replacement Guide: DIY & Professional Options Explained
Introduction
Replacing a kitchen faucet may seem daunting, but with the right guidance, you can complete this project successfully whether you're a DIY enthusiast or need professional help. This guide covers all faucet types and installation scenarios with expert tips from industry professionals.
Step 1: Prepare Tools and Shut Off Water Supply
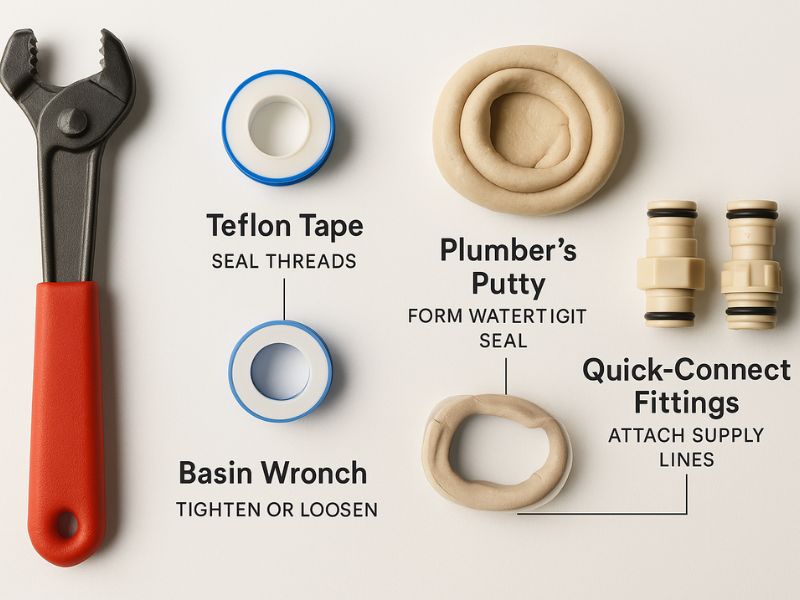
🛠️ Enhanced Tool Checklist:
- Adjustable Wrench (8-10" ideal for most connections)
- Basin Wrench (for tight spaces under sink) 3
- Plumber's Putty (for sink-mounted faucets)
- Flashlight (for better visibility)
- Silicone Lubricant (for O-rings)
🛑 Safety Precautions:
- Turn off both hot and cold water valves under sink before main valve 4
- Place bucket under connections to catch residual water
- Wear safety glasses when working under sink
Pro Tip: Take photos of existing connections before disassembly for easy reference during reinstallation.
Step 2: Choose Your Kitchen Faucet Type
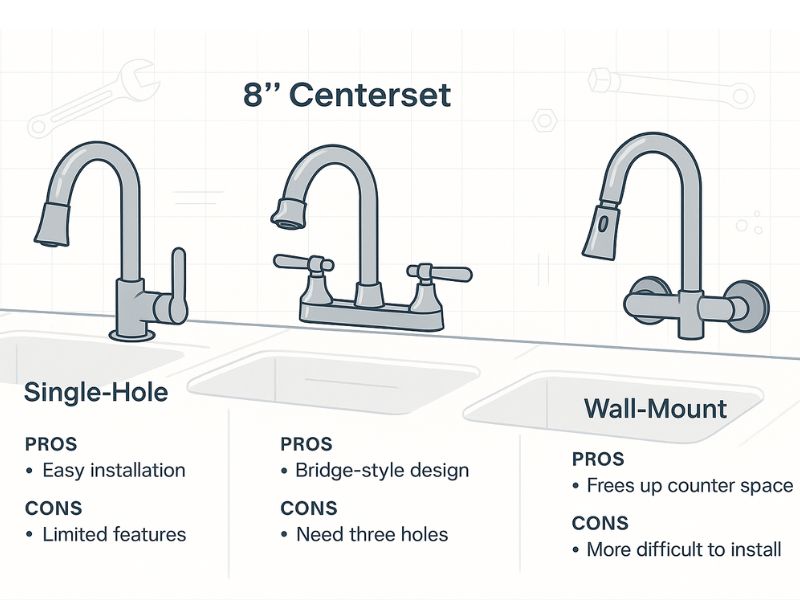
Comparison Table: Faucet Types
| Type |
Hole Requirement |
Best For |
Difficulty |
| Single Hole |
1 hole |
Small spaces, modern looks |
Easy |
| 8" Centerset |
3 holes (8" apart) |
Traditional kitchens |
Moderate |
| Wall-Mount |
No sink holes |
Open-concept designs |
Hard |
Specialized Faucet Options:
- Touchless activated models 1
- Pull-down/pull-out sprayers 1
- High arc designs for deep sinks 1
- Pot filler faucets for cooking enthusiasts 5
Step 3: Detailed Installation Guides

Single Hole Faucet Installation
-
Preparation:
- Clean mounting area with vinegar to remove mineral deposits
- Apply plumber's putty to base gasket (if included)
-
Installation:
- Insert faucet through sink hole
- Secure with mounting nut from below (use basin wrench)
- Connect supply lines with Teflon tape 2
-
Professional Tip: "Always hand-tighten first, then give 1/4 turn with wrench - overtightening causes leaks" 4
8" Faucet Installation
-
Special Considerations:
- Verify hole spacing matches faucet specification
- Use escutcheon plates if holes are worn
- Connect sprayer hose before final positioning
-
Troubleshooting:
- If handles don't align properly, check valve orientation
- For stiff operation, lubricate cartridge with silicone grease
Wall-Mount Faucet Installation 5
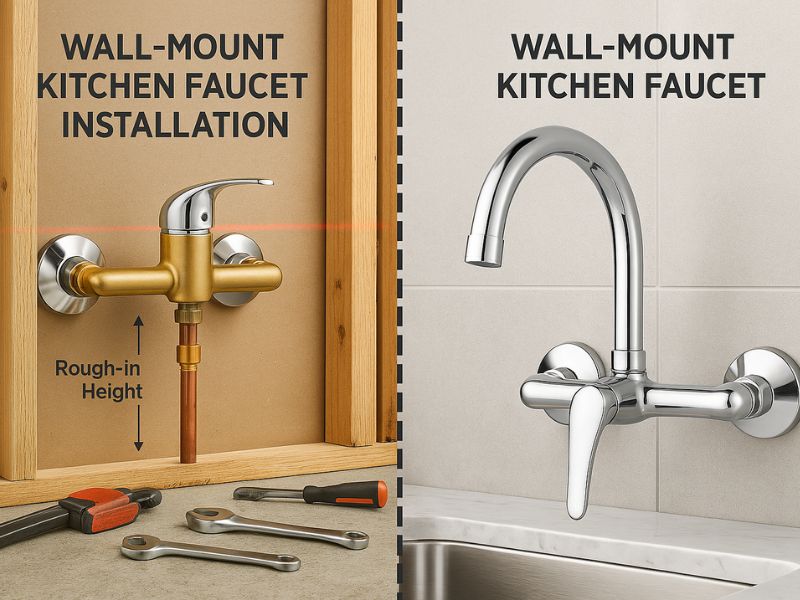
-
Rough-In Requirements:
- 3/4" plywood backing between studs
- Properly spaced hot/cold supply lines
- Access panel for future maintenance
-
Professional Techniques:
- Use laser level for perfect alignment
- Install shutoff valves in accessible location
- Pressure test before closing wall
Step 4: Testing and Adjustment
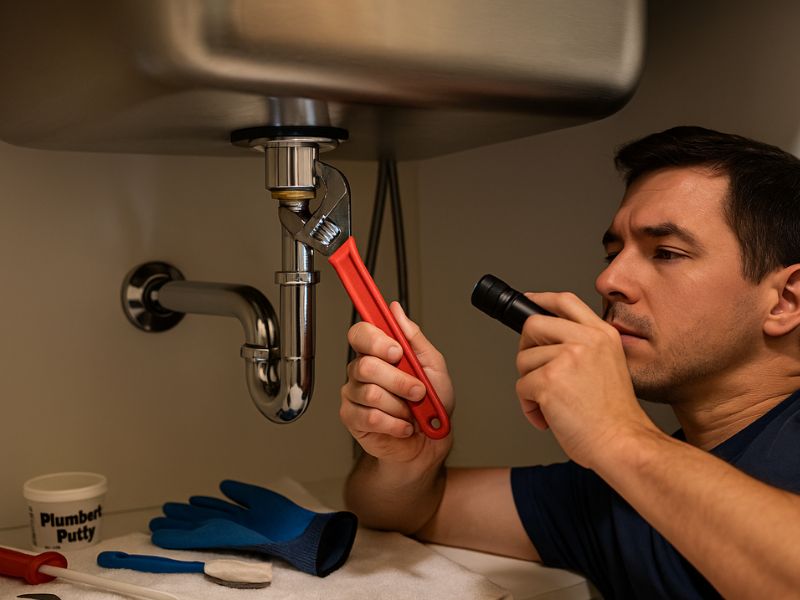
Comprehensive Testing Protocol:
- Slow water valve opening to prevent water hammer
- Check for leaks at all connections for 5 minutes
- Test all functions (spray modes, handle operation)
- Verify proper drainage and no sink leaks
Common Issues and Solutions:
| Problem |
Likely Cause |
Solution |
| Low pressure |
Aerator clog |
Clean/replace aerator |
| Leaking base |
Loose mounting |
Tighten locknut |
| Sprayer stuck |
Kinked hose |
Check hose routing |
Professional vs DIY Installation
When to Call a Pro:
- Wall-mount installations requiring plumbing modifications
- Homes with galvanized pipes or unusual configurations
- High-end faucets with complex mechanisms 4
DIY Success Tips:
- Choose "DIY-friendly" models with quick-connect fittings
- Allocate 2-3 hours for first-time installation
- Keep manufacturer's warranty information
Recommended Resources:
- Moen Installation Videos 4
- Delta Faucet Specifications 1
- Kingston Brass Technical Drawings 2


